Display configuration and mounting hardware depend on your order. Before staff begin assembly, confirm the exact setup with Jim and locate the instructions supplied with your shipment.
01Check the components
Compare your packing list with the grid panel, T-legs if ordered, mounting hardware, artwork, collection header, product organizer, product cards, lights and packaged prints. Tell Jim about missing or damaged items before assembly.
02Confirm the location
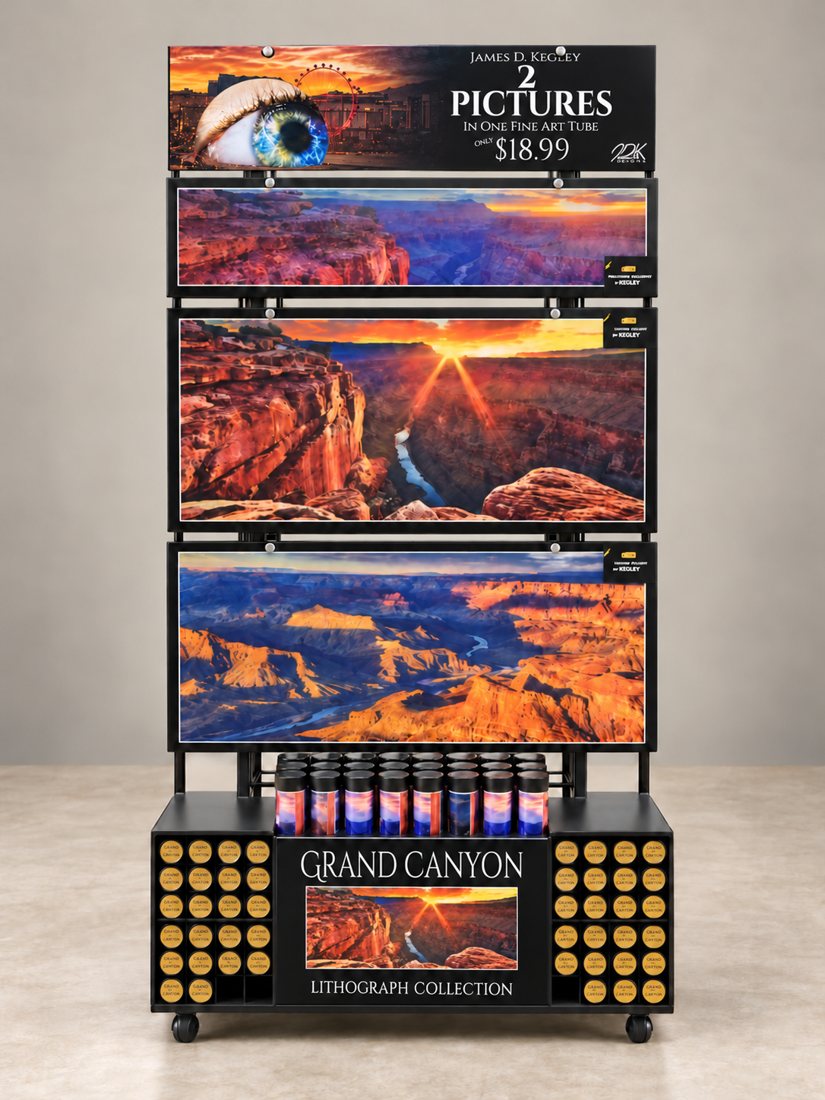
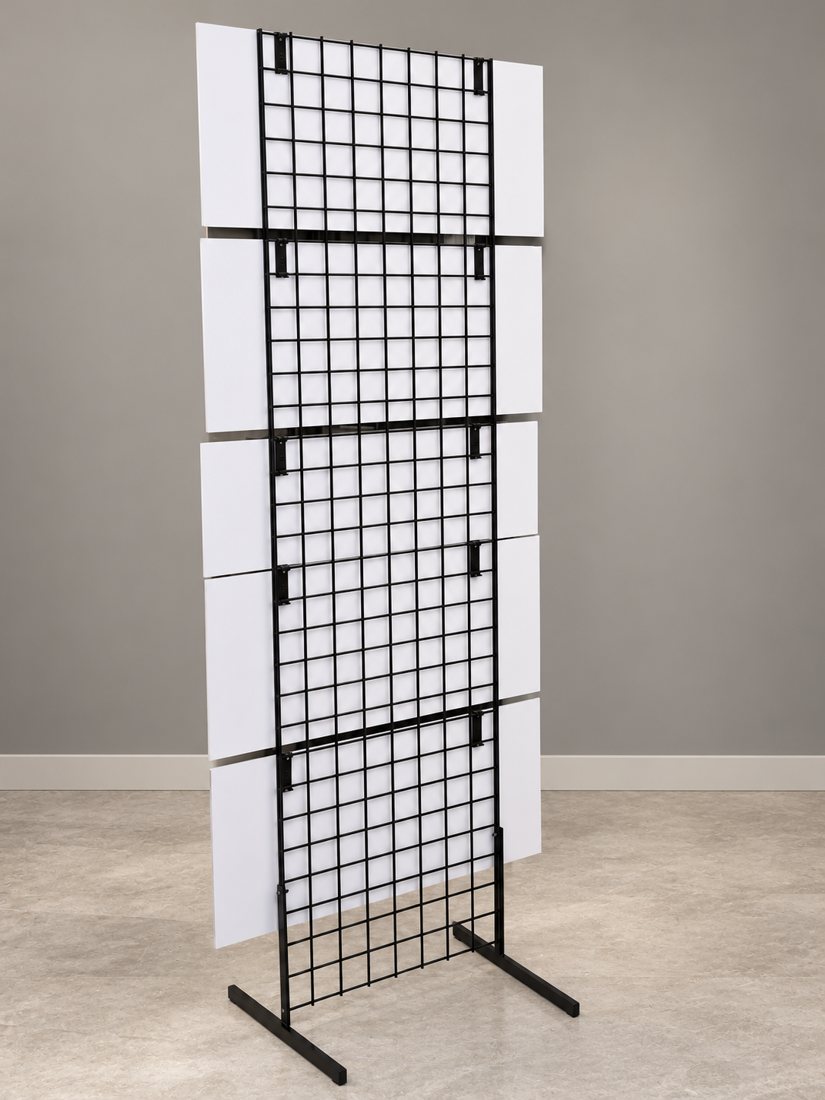
The standard grid is approximately 2 feet wide by 8 feet tall. The organizer is approximately 36 inches wide, 10 inches deep and 20 inches tall. Check the whole assembly, leg projection, ceiling clearance, customer circulation and access to a suitable power outlet.
03Choose the mounting method
Freestanding: use the supplied T-legs and the matching fastening diagram. Have another person support the tall grid during assembly. Wall-mounted: confirm the wall or slatwall type and matching hardware with Jim before drilling or hanging. A wall installation needs hardware suitable for that surface and load.
04Arrange the artwork
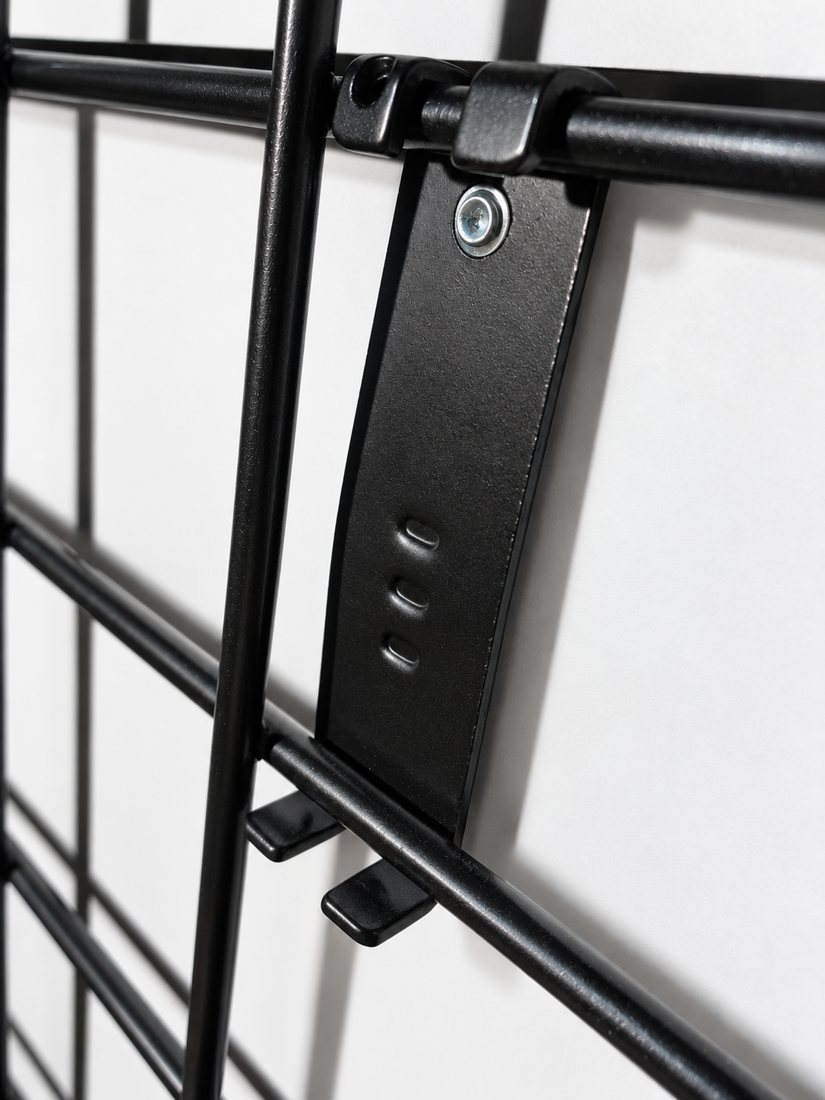
Follow the supplied arrangement, using the intended hooks and standoffs. The collection header goes at the top; the product organizer sits at the base. Check each bracket is seated and every panel is supported before releasing it.
05Lights and product cards
Install the supplied lights according to their instructions and route cords out of customer walkways. Add the matching title, product number and approved price card to each picture. Confirm the required tools and electrical details with Jim if they are missing from your shipment instructions.
06Stock and review
Stock the organizer according to your packing list. Match each tube to its displayed artwork and product code. Check the completed display is stable, then send Jim a front and side photograph for a setup review.